There are two types of people in this world: The ones who keep a clean and tidy inbox and the ones who have 10,000 unread emails on any given day. What’s the secret to an organized inbox? We asked Decimal Studios product manager Cherif Zouein, who prides himself on his tidy Gmail inbox.
“When I receive an email, I always take a first pass and decide whether to star it, respond to it, archive it or delete it,” he said. Sounds easy enough. But the truth is, a lot of organizing hacks lie in the Gmail interface. Read along to see some easy changes you can make to your inbox to keep yourself from drowning in email. You can thank us later.
Step 1: Take a first pass at your emails
Next time your phone buzzes with an email, ask yourself one of the following questions, Cherif says.
- Is this an email I can delete?
- Is this something I can handle later?
- Is this something I can quickly respond to
- Is this something I can archive?
Step 2: Set up your inbox
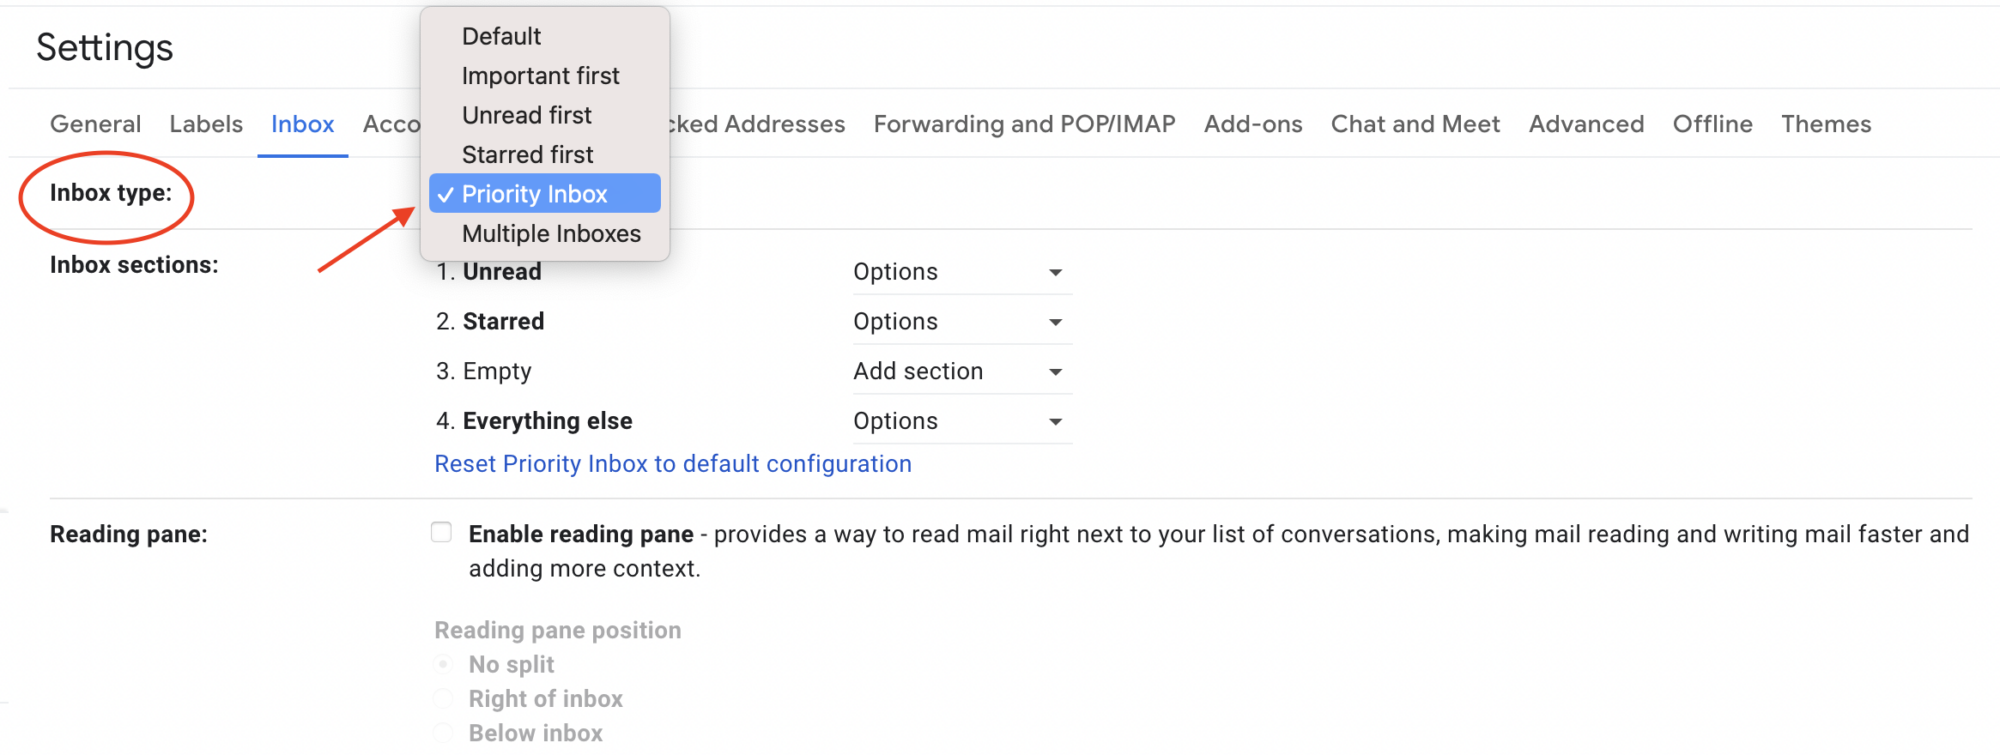
Cherif recommends disabling Gmail’s default setting that organizes your inbox into three categories — Primary, Social and Promotion. Instead, use the 'Priority Inbox' feature. This allows you to categorize your emails by importance, Cherif explains. For Cherif’s workflow, he prefers his inbox to list his Unread emails first, followed by Starred and all other emails. To make these changes, go to Gmail Settings and select the Inbox tab. In the dropdown menu next Inbox type, select ‘Priority Inbox.’
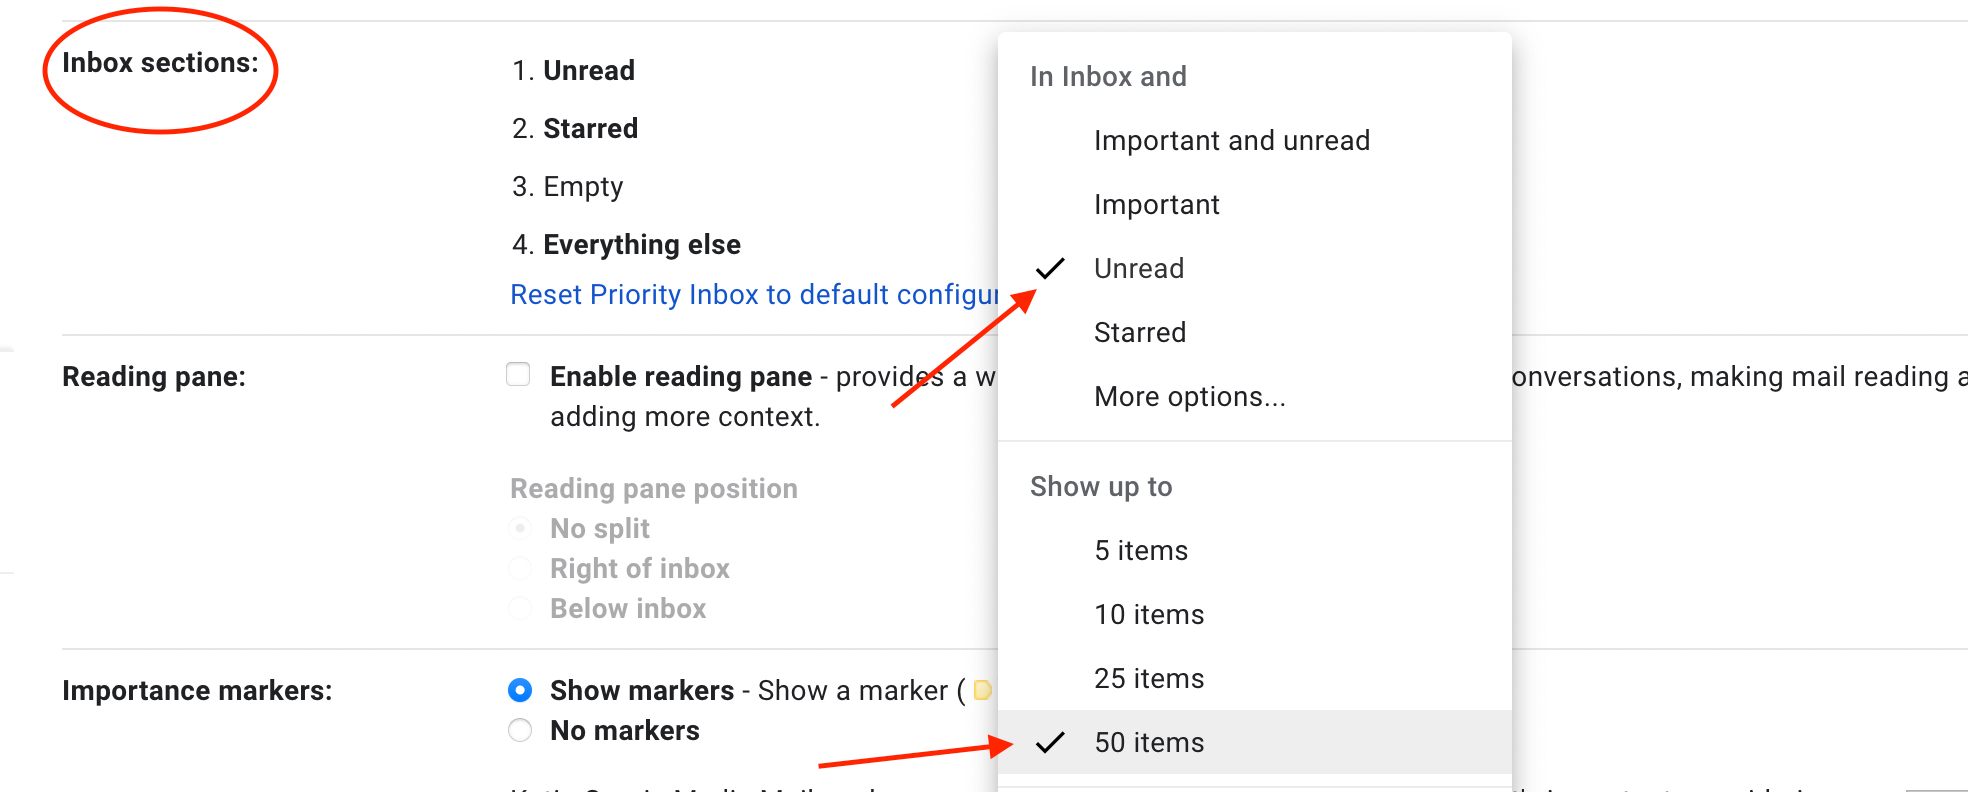
Next, choose which sections to feature in your inbox — Important, Unread, Starred, etc. When selecting your sections, choose how many emails you want this section to show — from five emails to 50 emails. Cherif prefers to show all of his emails in each section.
Step 3: Create a workflow
Three words: Star, Archive, Delete. That’s what should go through your head when you are reading an email.

- Star emails that require an action that you can come back to
- Archive emails that you have read, but would like to keep a record of
- Delete junk emails and unnecessary threads that are outdated
“This allows you to process emails as they come in and not have a number of unread emails that continues to build up,” Cherif told us. To create a workflow, use Gmail’s label feature, which allows you to filter all emails related to a particular topic to one folder. You can color code each label to keep yourself organized.
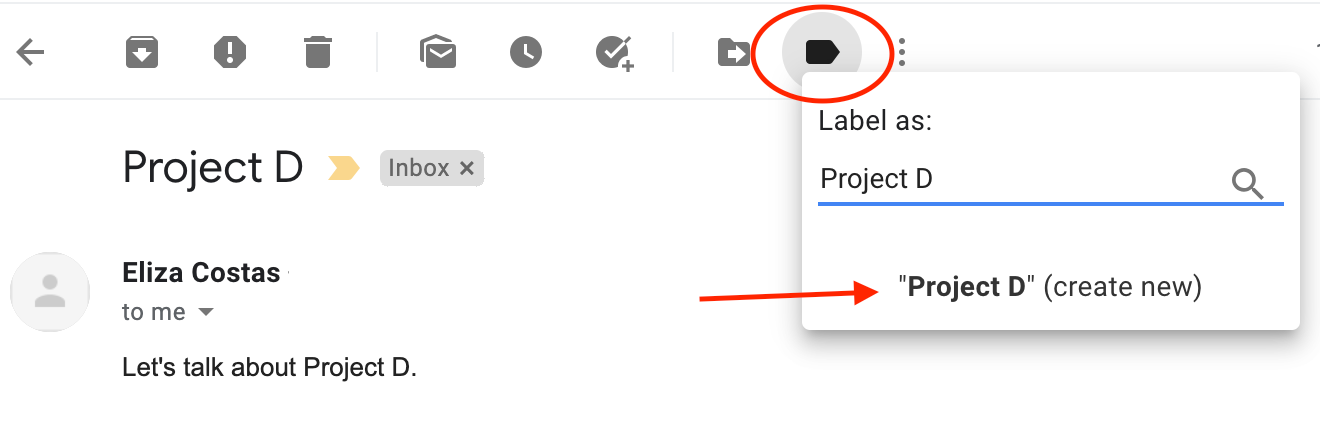
Create a label for a specific email by selecting the Labels symbol at the top of your email. Type in the name of the Label and click Create New.
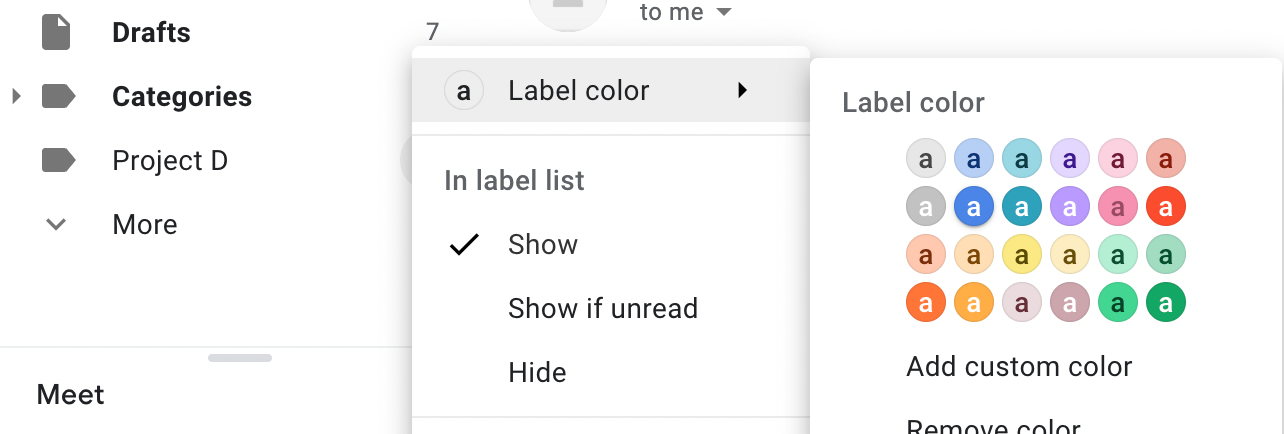
As you add more and more labels, Cherif recommends color coding your labels to keep your emails organized. Click the three dots next to the label folder listed on the left-hand menu to add a color to your labels.
Step 4: Keyboard shortcuts
Once you’ve mastered organizing your Gmail, you’re ready for keyboard shortcuts. Gmail Shortcuts can be enabled in Gmail’s settings and will make sorting through email much faster. Here are some of Cherif’s favorite shortcuts:
- Press the ‘R’ key to reply to an email
- Press the ‘A’ key to reply all to an email
- Press the ‘F’ key to forward an email
- Press the ‘C’ key to compose a new email
- Press the ‘E’ key to archive an email
- When looking at your inbox, press the Up and Down arrows to scroll through
- Press Enter to open an email
- To send an email press Command Enter